“Saturn V Third Stage and Command Module Connector” Eric Miner, 2002
Stereoscopic Imaging
“Also called stereoscopy or 3D imaging. Stereoscopic imaging is a technique used to record and display 3D (three dimensional) images or an illusion of depth in an image. Stereoscopic images provide spatial information that trick a user's brain into believing and seeing depth in the images.”"Stereoscopic Imaging” Webopedia
Depth Perception:
How We Gauge the Physical World Around Us
“Depth perception is the visual ability to perceive the world in three dimensions (3D) and the distance of an object. Depth sensation is the corresponding term for animals, since although it is known that animals can sense the distance of an object (because of their ability to move accurately, or to respond consistently, according to that distance), it is not known whether they “perceive” it in the same subjective way that humans do. Depth perception arises from a variety of depth cues. These are typically classified into binocular cues that require input from both eyes and monocular cues that require the input from just one eye. Binocular cues include stereopsis, yielding depth from binocular vision through exploitation of parallax. Monocular cues include size: distant objects subtend smaller visual angles than near objects.”“Depth Perception” Wikipedia
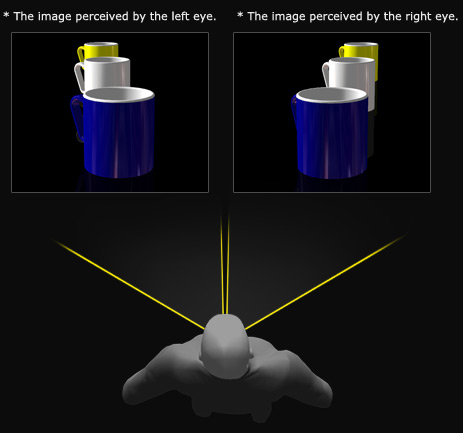 “How Do People Preceive 3D?”Authentic 3D
 “First & Second Stages of a Saturn V” by Eric Miner
Seeing The 3D
I first got interested in stereo photography in my early college years when I took a geology class. Much of the time we viewed aerial stereographic images of terrain, rock outcropping, mountains, dry river beds, etc. We were given small stereo viewers with stands that we would put down over the photos to view them in 3D. It worked well and everybody in the class was able to see the 3D effect. But, I couldn't see a lot of the image through the viewer. So, I took the instructor's advice and tried to view them without the viewer. He had explained a bit about how to ‘free view’ by crossing your eyes and then relaxing them until the images ‘fused’ or merged into a 3d view.
For me it came quickly for others in the class it took longer, but all of them got it eventually. Once you free view your first stereo image you'll want to do it again and again. Now for the disappointing bit; some people are never going to be able to free view a 3D image. For those folks, using a stereo/3D viewer is the answer. For people who have no or very little site in one eye it will be impossible.
 “Company of Ladies Viewing Stereoscopic Photographs” by Jacob Spoel, before 1868
 Wikipedia: ‘Stereoscopy’
My tutorial on viewing stereo images…
Were you able to cross your eyes when you were a kid? If so you’re on your way to free viewing, if you don't have practice crossing you eyes I’ll do my best to explain how I do it;
- 1) Relax your eyes and lean back a bit , try to look through your monitor, you’ll notice that the world is now split into two images.
- 2) Now, try to re-merge the two images in front of you back into the scene your seeing.
- 3) Do this a few times to get your eyes use to the feeling
- 4) Now try the “The Famous Frankfurter Experiment”, and then practice as much as you can.
Some Other ‘Free Viewing’ Tutorials…
There really aren’t that many good tutorials for leaning to free view stereo images out there. Here are some of the best I found after a long search:
- “How to see 3D photos” – This one is the best I came across…
- “How To Freeview Stereo (3D) Images”
- “Stereo Viewing”
- “How to view stereoscopic digital photographs Machu Picchu in 3D!”
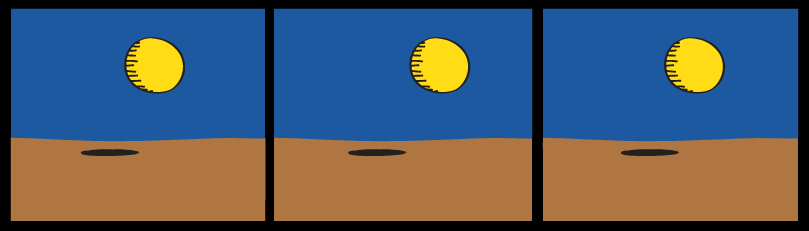 “The Floating Golden Ball In 3D” by Eric Miner 1968 and 2008
More Tutorials That I Cut and Pasted For Your Edification…
“The Famous Frankfurter Experiment”
“The Famous Frankfurter Experiment” Optometrists NetworkThis exercise is good for both parallel and cross-eye viewing methods.
“The Famous Frankfurter Experiment”
demonstrates exactly how the eyes are used during parallel-viewing (Magic Eye 3D viewing). If this experiment is successful, you'll see a miniature frankfurter floating in the air as pictured above. Wow.

- 1) You need to look into the distance for this, so turn away from the computer monitor
- 2) Pick a specific object in the distance. Aim your eyes at that target.
- 3) While looking at that distant target, bring your index fingers, tips touching, up in front of your eyes and into your line of sight.
- 4) While still aiming your eyes at the distant target, calmly notice that a mini-frank has appeared between the tips of your fingers. Do not allow the awesome beauty of the mini-frank to distract you and cause you to aim your eyes directly at it. Continue to aim your eyes into the distance at your target.
- 5) Pull the tips of your fingers apart slightly and observe the frankfurter floating in the air.
- 6) Wiggle your fingers and watch the mini-frank dance.
Remember how your eyes feel while performing this depth-defying frankfurter feat and you can apply the same skills to 3D viewing.
 “Stereo Stars” by Eric Miner
Two Ways To Cross Your Eyes
There are two free-viewing methods that can be used to view stereo images; Parallel and Cross-Eyed. Different people will usually find one more comfortable than the other. There are a few that will find both equally easy to use.
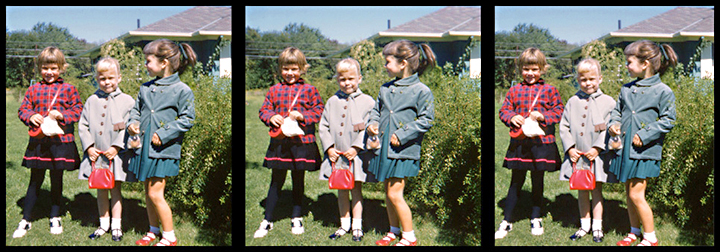 Laurie (my wife, on the left) and her two best frineds (still are) on their first day of school in 1960.
 [Photo by her late father Meyer Zuckerman using a Kodak stereo camera.]
“3D Viewing with Training Wheels— The ‘Dots’ Method”
“The Dots Method” @ Optometrists NetworkTwo dots (or other shapes) are sometimes put at the top of stereo images to be used as “training wheels” for free-viewing. Just as training wheels help you learn to find the proper balance on a bicycle, dots can help you learn proper “balance” in free-viewing. They help you figure out exactly where to aim your eyes. Also, at first, the dots are easier to do than a more complex stereo image.
With the parallel viewing method (a.k.a. the divergence or Magic Eye method), the lines of sight of your eyes move outward toward parallel and meet in the distance at a point well behind and beyond the image. That’s why it's called parallel viewing. When you parallel-view, the muscles inside your eye that control the focusing lens relax and lengthen.
Remember the Famous Frankfurter Experiment? The two dots are just like your two fingers in the Famous Frankfurter Experiment
The two dots form a stereo pair. When you 3D view them you will see three dots – the middle dot will pop out in 3D.
- 1) Aim your eyes between the two dots. Look through the monitor and into the distance. Think X-ray vision! While aiming your eyes far into the distance, pay attention to what happens to the dots. You may see the two dots become three very easily. If that is the case, adjust to seeing 3D. Notice how your eyes feel and maintain the same feeling while you SLOWLY move your eyes downward to the center of the stereo picture.
- 2) If you see only two dots, you are probably looking at the dots themselves. Look through the dots. Try again. Aim your eyes between the dots and into the distance.
- 3) If you see four dots instead of three, you're almost there! Relax and aim your eyes further into the distance. Let your eyes drift outward and make the two middle dots slide towards each other until they merge or overlap. If you can't get the inside dots to move towards each other, you need to relax your eye muscles more. Look farther into the distance. Imagine you are looking at a sailboat way out on the ocean. Relax. Breathe.
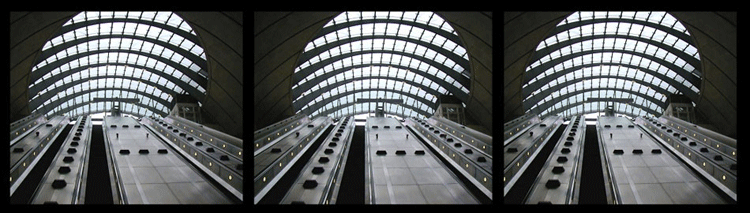 “Canary Wharf Station, London” by Eric Miner
 3D Design by Eric Miner
This is my prefered free–viewing method. I suggest that you learn both and see which is most comfortable for you.
“Cross-Eyed Viewing with the Dots”
From "Optometrists Network"Another method for 3D viewing is called cross-viewing or the cross-eyed method. You aim your eyes so that the lines of sight of your eyes cross in front of the image. When you cross-view, the muscles inside your eye that control the focusing lens contract strongly and shorten.
If you cross-view images intended for parallel-viewing, shapes that should pop out will look punched in. For example, a stereo image that was designed to have a star popping out in 3D would look like it has a star-shaped hole cut into the background.
If you come across the old side-by-side stereo photograph cards (made to be viewed with a hand-held or table stereoscopes or stereo-opticon), you can use the cross-viewing method to free-view the images.
Many kids master the skill of crossing their eyes in order to impress family or friends. Were you one of those kids? If so, cross-viewing is right up your alley. Cross-Viewing is also called Cross-eyed Viewing. It might feel like you're cross-eyed when you do this, but are you really? Well, not as much as those goofy kids.
- 1) You need to focus your eyes in front of the 3D image, so you'll use your finger to help you find the right place to aim (converge) your eyes. Bring your forefinger up about six inches in front of your nose. Focus both your eyes on your finger.
- 2) Still focusing on your finger, notice what has happened to the dots on the screen. You should see four dots.
- 3) Move your finger very slowly toward the screen (still focusing on it!) until the two middle dots slide together and merge into one. The middle composite dot should pop out in 3D. Use your finger to help you, but you will need to get it down a4) nd out of the way in order to see the 3D figure unobstructed.
- 5) If you have problems, play with the positioning of your finger. Slowly move it back and forth until you find the position that gives you the 3D image.
- 6) At first, the 3D image might come in blurry. Give your mind a chance to organize itself and the 3D image will become sharp and clear.
It's good exercise for your eyes to alternate between cross-viewing and parallel-viewing. If you have any questions about any sensation you feel while trying these methods, check out
 2D graphic by Go Media, 3D conversion by Eric Miner
“Help: How to Free-View the Stereo Pairs”
From Boris Starosta Stereoscopic Art & 3D Photography“Each stereo view consists of two images, one for each eye. Free viewing is the technique that will allow you to direct each of these images separately and simultaneously into each eye. Once that happens, you are said to have “fused” the pair of images into a stereo view.”
“All the stereo pairs shown on this site are in the “cross-eyed” format (my apologies to all the “wall-eyed” people). That means that the first (leftmost) image is for your right eye and the right image is for your left eye. Looking at the pair in a natural, relaxed manner, what you see will be similar to this:”
“Now cross your eyes, so that the pair of images will double to four, and be somewhat out of focus:”
“Next, slowly uncross your eyes, and observe with your mind what is happening to the images. At some point, the two pairs of images you are seeing will begin to overlap:”
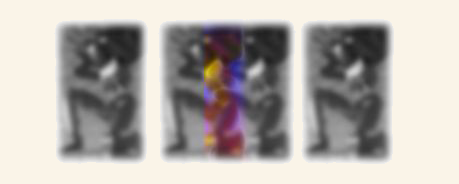
“I am indicating with color the region to which you must direct your attention; that area of overlap is where you will fuse the left and right images of the pair. Fusion (yet still without focus) will look like so:”
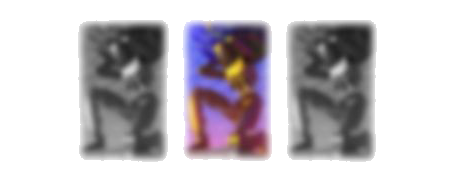
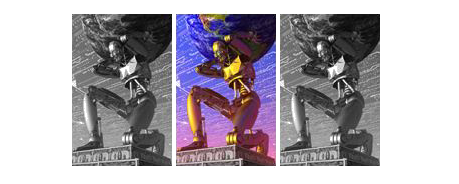
“At this stage, your eyes are crossed just the right amount, but your eyes are telling your brain that they are pointing at something about four inches in front of your face; so that's where your eyes are focused. You must dissociate the focus from the pointing, without changing the pointing of your eyes! Simply continue to keep your eyes crossed, keep the blurry images fused, and relax. Examine the blurry details in the fused center image. In a few moments, your brain will direct your eyes to focus on these details without uncrossing. The result is magical, as the image pops into spatial focus:”
 Text and images in the above section by Boris Starosta
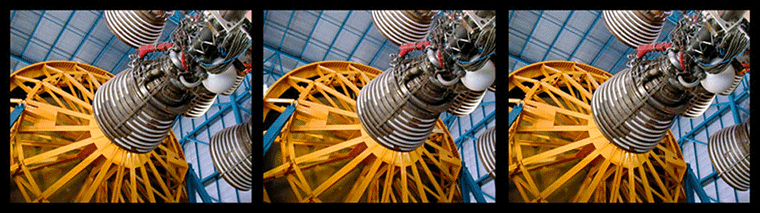
A Note On The “L–R–L” (Left–Right–Left) Stereo Image Format
You’ll noticed that my stereo images are displayed using three ‘frames’ instead of just two. This is called the ‘L-R-L’ (left-right-left) format. Many stereo photographers use it to show their images; it’s required by some competitions. It works well for all viewers because they have the chance to view the image using the technique that works best for them instead of being forced to use a method that may not be comfortable for them. People who are new to viewing stereo image say it’s easier for them to lean than having only on choice for free-viewing.
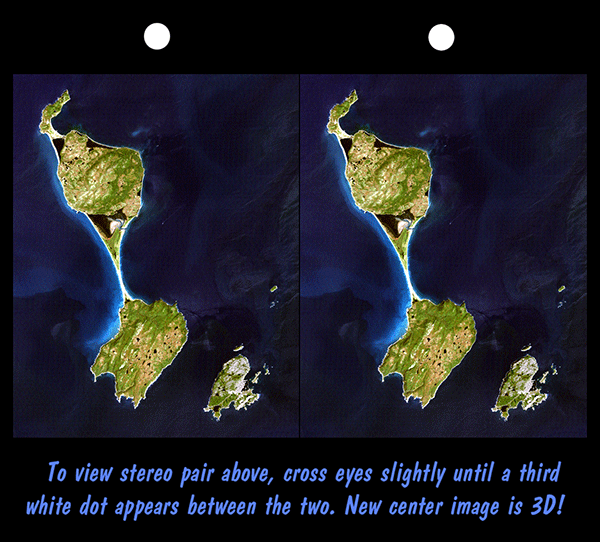
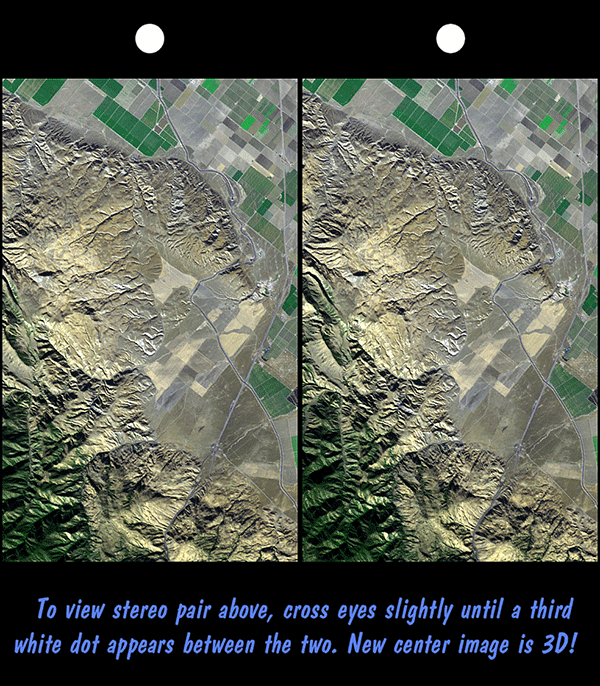
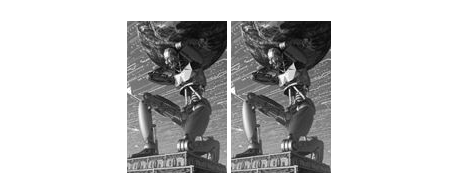
Some Stereo Images To Practice With
These images are from an old NASA site about an Earth observing satellite. They’re useful for practicing the cross-eyed technique because they not only have the ‘dot’ above each image they also have a short set of instructions.
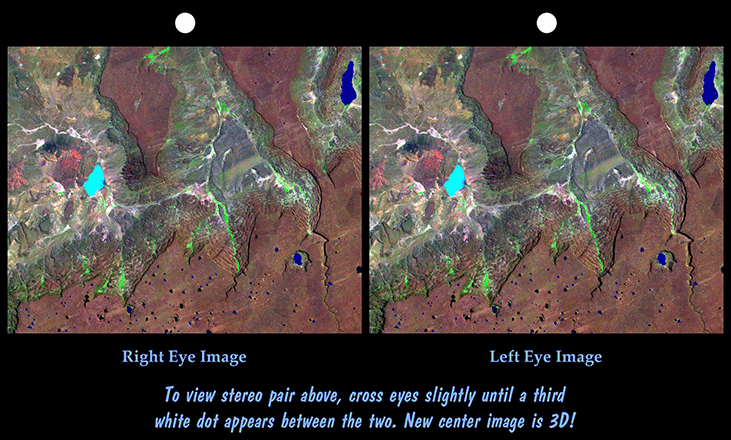
If the above image looks like a ridge of hills above a flat red plain you’re using the wrong method — It should appear the opposite. Relax your eyes and merge the two images again, you’ll get it.